Speedtree quick start.
I don’t know if people are facing problem using Speed tree but I’m going to start a sort of tutorial.
It’s going to be mainly outdoor oriented because there is sufficient indoor references. I’m in learning process so feel free to correct me if I’m doing anything wrong.
So the first part will be focused on creating speed tree and the basics features and functionality. I’m not going through all the details because there is a documentation accessible from the help menu.
So start of by creating a new document. You should see a blank screen appear.
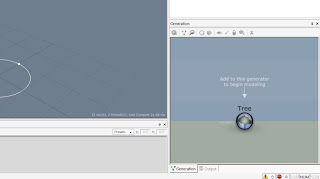
To start building your tree just start by right clicking on the tree icon on your generation window on your bottom right
From there you can select what type of part you want to add to your tree. The menu is self explanatory.
For this mini tutorial we will select the “standard RT” trunk. You’ll see the trunk appears in the main window.
In the top of that window you can toggle the display features.
You can switch on and off the light, the shadow, the tree, leaves and other features. You can also change the display mode in the generation tree.
In the asset/ material menu in the top right click on the [+] sign to add a texture. Select a texture in your browser and load it
Click on the tree then, in your property menu roll down and select material/ branch, open it. Switch none to the texture you just created. (Takes time to load)
You can tweak the tree using the property tool but I’ll let you try those setting. Just want to say you can use a curve and the curve presets to change the setting over the height
So after you tweak a bit just add a branch node on top of the trunk in your generation window. I pick the branch “standard RT “for this tutorial. As you can see the texture material from the branch is derived from the trunk.
I just tweaked few feature like length ( self explanatory) , the frequency ,the start and start angle.
The start is a sort of scale to represent where the branching start. So if 1 is the top of the tree and 0 the bottom so 0.5 is the middle. I set my start to 0.3 for example.
The star angle is self explanatory and you can tweak the curve to create variations in your branching.
I decided to add another set of branch to create a better look. So on top of the first branching I add another one. I had to resize it to ten to make it look realistic.
So that’s my favourite part. We need to add leaves. So on top of last branching just add leaves. I pick wild but you could pick just standard.
Then just add a new material like for the trunk. Asset-> material-> [+] -> select texture . Then in the property panel look for the leaves option, open it and the select the texture in the type setting. Change it just like for the trunk and you should have something like that.
I change the size a bit using the curve to create a sort falloff. You can multiple set of leaves on top of branching.
So that’s it for a pseudo tutorial. I may post some other experiment small tutorial just to starters like terrain and such.
Next is to get those trees on the game engine.
Edit speed tree UDN is accessible now so maybe you can have a look to have a official paper explaining all the feature in it.


How do you make the leaves show without being on top of the boxes? When I add the leaf texture to the leaves it just puts it on top of the boxes and it looks awful
ReplyDeleteyou need to use an alpha channel
ReplyDelete